Category Archives: Garden tasks

Rose pruning – the climbing ones

Welcome to my rather belated follow-up about climbing roses. I hope you find it helpful!

All the things I said about tools, hygiene, angles of cut and roses being as tough as nails in my how-to about pruning shrub roses also apply here. You might also need a ladder – be careful! No leaning out from the ladder or placing it on wobbly ground. It’s naughty and I never do it myself. Honestly.

As before, the first step is to stand back and look at your rose. If it has an existing framework of main stems are there gaps in it? Are any existing bits of the framework dead or diseased or just really old and gnarly? Are there any conveniently placed strong new stems that could be tied in to fill these gaps and replace the dead bits? If there’s no framework yet, which are the strongest looking stems? Are these strong stems flexible and in good positions?

Climbing rose before pruning

Just a quick note on framework stems –  it is best to tie them in as close to horizontal as possible as this encourages more flowering. This means a roughly fan or ladder-shaped framework is best. Which stems are framework stems? Any you choose to use that way really – healthy strong looking ones for preference.

Now to start hacking! Cut all the stems back to two or three buds from the framework except any you’re saving for the framework. Careful – this is a prime moment for accidental amputation of the wrong bit and I don’t mean fingers (although that would be worse as they don’t grow back!) Remember to cut back to a bud pointing outwards and upwards if possible. Then completely remove any dead, diseased, crowded or badly placed bits.

If this is the climber’s first year you won’t be cutting much, if anything, off at all. Having said that, it is worth shortening your new framework stems by a few inches to a strong bud as this will encourage branching and expand your framework for next year.

Here’s a close up example of using a stem to create a fuller framework:

Climbing rose before pruning - close-up

You can see there’s a bit of a gap in the middle of this area and to the left there’s a strong and flexible stem which might be a good candidate to fill the gap, as long as it doesn’t break when I try to bring it round. This can be a problem if you want a stem to go in a very different direction to it’s original growth – if you have a stem that is already going in the right direction it’s better to use that.

Climbing rose after pruning - close-up

You can see I successfully filled the gap and cut back all other stems to a few buds.

So once you’ve chopped off everything that needs chopping tie in your new framework stems and replace old ties. For tying in I mostly use twine but have also discovered Soft-tie which consists of a wire core covered in rubber and I now use it for holding up the main support points of the heftier roses which can suffer badly from twine ties. A big old rose is quite a heavy beastie!

And that’s it. Ta da! Job done.

Climbing rose newly pruned

So that’s climbers. What about rambling roses? Ramblers generally have masses of small flowers, rather than single larger ones, and are often a lot more vigorous than a climber. They can be treated as a climber if there isn’t really the space to just let it go, otherwise just keep it within its allotted space and cut out anything dead or diseased and the occasional old stem.

Good luck with your roses and try not to fall off any ladders!

Rose Pruning – the shrubby ones

Well it’s that time of year again. I’ve sharpened the tools and donned the gloves that are never quite thick enough. I’m going to share a quick how-to on here as rose-pruning seems to be something people are a little scared of sometimes. I’ll follow up with a post on climbing roses in a week or two.

You need sharp and clean secateurs, loppers and a saw. Oh and gloves unless you enjoy laceration. I keep a bucket of made up Jeyes fluid in the shed and between areas of roses and at the end of the day I give the tools a swish and a clean to avoid spreading diseases about the place.

Rose before pruning

First things first – a healthy, happy rose is about the toughest thing in the garden. Even if you cut it off to an inch above ground level it will probably be fine, so don’t stress. Having said that … the idea of doing this with a hedgtrimmer… erm. Yes. Well, if you want your roses to look like a tangled mess, prone to disease and reduced flowering, go ahead. They’ll survive. Probably.

Any cuts you make should be as small as possible and angled so that water doesn’t sit on top of the cut. You’ll sometimes see ‘at 45 degrees to the stem’ as the required cut angle but frankly as long as water won’t sit you’re fine.

Rose stem showing pruning cut

First have a stand back and look at your rose. Is it wonky? Are there dead bits? Learn from my mistakes – really look at the branch you’re about to snip, follow it right to the end. How many times have I made a cut and groaned as the wrong bit of plant has fallen to the ground? Ho hum.

So now to the cutting! Remove any dead or diseased branches right to the base and then anything rubbing on other branches. I also remove anything crossing the centre of the bush as I want to keep the middle clear to create a nice open shape with plenty of airflow. You might also want to remove one or two of the older, gnarlier looking branches if it’s looking a bit crowded.

Then cut all the remaining branches back to a bud which faces away from the centre of the bush (or otherwise in the direction you want the rose to grow, like away from a path or wall) to about 1/3 of its original height. Note – I’m a little vicious and err on the side of a somewhat brutal interpretation of ‘1/3’. Seems to work fine…

Stand back and admire your work (and try not to swear about that bit that broke when you cut it and you had to cut back further than intended).

Rose after pruning

I am nowhere near this brutal with old english roses or miniature ones although the same general principles apply. For species roses and others which tend to spring in an arching fashion from the base I remove a few of the oldest stems but otherwise leave them to their own devices.

I’m sure most of my readers have no need of this post but thought it might help the occasional passer-by. Good luck with your rose surgery!

Phew! Bulbs all planted.

Remember in my November round up I mentioned vast quantites of daffodil bulbs were due to go in rock hard ground? It’s done! Finito! Hurrah! And I can still stand upright, much to my surprise.

They went in this currently quite boring field:

Tea House field

There were six different varieties which have been put in six different groups. This field is one of the odd spaces on the estate in that it’s not really my territory, in that Mr Farm Man mows it, seeds it (just before the drought, hence the thistles) and generally has the care of it but bulbs are clearly gardening, not farming, so I got to plant them. I did try to make the case it was his job to plant the bulbs but failed. To be fair he was right.

So I started on Friday and (barring the weekend of course) did very little else but plant bulbs until mid-morning today. MsV joined me for Tuesday and Wednesday and all in all it wasn’t nearly as boring or as back breaking as I’d feared, partly because the recent rain has had some impact and the ground, though still heavy clay, wasn’t brick dry heavy clay any more.

Now I just get to look forward to them popping up!


New Border Joy!

Hurrah! I’ve finished the new plantings!

I had been hoping to plant up the new borders in the lower part of the gardens at the start of this month but supplier/delivery confusion meant they only arrived late on Tuesday. The beds were waiting, dug over and prepared, ready for the new arrivals so yesterday morning I set to with great relish.

I started with Soggy Bottom:

Newly planted border

These new borders are in an area which becomes very wet in winter and we had the choice of digging up the gardens to install a field drain type system or work with what we’ve got and plant accordingly, which was a no-brainer. The soggyness is also why this is happening now, when the bed is workable, rather than Spring when it’s a quagmire. This picture is the new half of the bed, to the left of some gates. To the right the border is largly taken up by some existing Cornus and a Viburnum opulus, so I chose to plant some of these on the left too. The right hand side has been given a neat edge and some space has been cleared so I can include some new planting there too.

Newly planted border

I’ve used Actea for some height alongside the Cornus, and Rheum ‘Ace of Hearts’ (currently dormant and virtually invisible) for some big dramatic foliage. There is Carex testacea and a variegated grass to give some movement and year round interest, plus Persicaria atrosanguinea, Iris pseudoacorus, Iris ‘Gerard Derby’ and a double Ranunculus  for some colour.

So that was yesterday. Today I had the further fun of planting up the other border. This runs alongside the outer edge of the private walled garden which contains the swimming pool. Consequently I’m calling it the Swimming Pool Wall Border which lacks something in snappiness, I’ll admit. Although it’s close to Soggy Bottom it is distinctly unsoggy and I dug in some well rotted muck to help the soil with structure and extra worms, seeing as there was a dearth of worms as MsV and I dug it over (Note – MsV got to help dig it but not plant it – hugely unfair I know but she’s on holiday this week!).

Newly planted border

The existing plants are just the roses, and at the top end a rather thuggish Chaenomeles. By way of shrubs for the border I chose Philadelphus ‘Belle Etoile’, red leaved Prunus ‘Cistena’ and a fuchsia for which I’d ordered the elegant white ‘Hawkshead’ but ended up with a pink one. I’m pretty sure it’s the tough pink one with small flowers that gets really big if allowed – the name escapes me but it’ll do the job so I couldn’t be bothered to complain and we hack Fuchsias back every Spring which keeps ’em in line. For perennials we’ve got Stipa tenuissima, Clematis integrifolia (which is herbaceous and not climbing), Salvia sclarea, Campanula pyramidalis, Verbascum (thapsus and phoeniceum), Fragaria ‘Red Ruby’ a hardy Geranium  and various other pretty bits and bobs.

I’m really pleased with it now it’s done, though obviously in my head I can see what I’m expecting it to grow into, whereas what it actually looks like right now is a few sparse leaves stuck in some mud. I’m really looking forward to seeing it all sprout in Spring (fingers crossed that it does sprout!).

PS. Apologies for the fact I didn’t think to bring my notebook home with me so some of these names are incomplete as my addled brain can’t remember them all!

Pimp my Pampas

Like many people I’m not a big fan of the large lumps of Pampas Grass sprouting from lawns that afflict many gardens, including the car park at Layer Marney Tower. I have plans for three of the beastly five which will involve large soil moving machinery.

When I first arrived the poor things were looking pretty bloody sad even by Pampas Grass standards. I took trailer load after trailer load of dead and rotting detritus out of them in my first Spring and every year since I have pulled out the dead leaves and flower stalk stumps and given them a tidy up in Spring. I cut out the fallen stalks as they succumb throughout the winter, to keep them tidy. And they have been rewarding me for this TLC by flowering like stink:

Pampas grass

I rather like the way these two monsters frame the entrance ramp and so they will probably survive the massacre (whenever it happens – I’m putting my money on 2015).

Winter Containers

Before all the raking last week I planted up our winter containers, thinking I would be a bit run off my feet for the next couple of weeks.

Winter containers - Cyclamen, Heather, Ajuga, Box and Bay

Outside the Long Gallery where we hold our wedding receptions I planted up the troughs with Cyclamen, heather and Ajuga, very similar to last year. These little cyclamen are something of a gamble as in a cold winter (like last years) they tend to get rather unhappy, but in a mild year they can be good for a fair while. The heather and ajuga combined with the simple shapes of the box and bay can ‘carry’ it by themselves if the cyclamen do fail. Last year I left the Ajuga in the containers through Spring and into Summer when they succumbed to powdery mildew. Next year I think they’ll go out into the garden when I put the Summer plants in.

In the stone trough outside the offices I took a different approach to previous years.

Winter container planting - pansies and hellebore

Close up of winter container - pansies and hellebore

The shrub in the middle is a permanent planting of Myrtle which I’ve surrounded with silver variegated ivy, blue violas and Helleborus argutifolius ‘Silver Lace’. I’m never sure about pansies/violas for the winter because I use them so much the rest of the year and also because I think of them as a Spring plant, so they seem a little out of place in Winter. I’ve decided to give them a try though because yet more heather and cyclamen is getting, well, boring. The rather lovely silvery hellebore can certainly find a spot in the garden come Spring – I do like using plants for containers that can then be transferred to the garden once their job is done.

The sheep have already escaped once and pulled all the ivy out. Fingers crossed that between sheep and winter these plantings get through to at least late January relatively intact!


Bah! Autumn lawn care.

I’ve just spent days hauling heavy lumpy bits of equipment around and raking and shovelling and generally getting rather tired all in the interest of the annual lawn maintenance. Yawn.

A few weeks ago I used an autumn lawn fertiliser (low nitrogen so as not to encourage lots of soft green growth just before winter) and then this week set to doing the hard bit. First MsV and I scarified the lawns which necessitates lots of raking up of the resulting loose thatch, grass and bits. Then I hauled a heavy hollow tined aerator around which is like a hyper driven apple corer and takes little cylinders of soil out to allow air down to the grass’ roots. All these soil cores need to be raked up of course because for some unknown reason the aerator doesn’t collect the bits itself. Lunacy. And then we spread 4 tonnes (or do I mean tons – worryingly I don’t actually know) of topdressing over the formal lawns consisting of 1/4 fine topsoil and 3/4 sharp sand, which should work its way down into the holes left by the aerator and help to relieve compaction and improve the soil. This required more raking action to spread about and work in.

If I never see another rake again it will be too soon. Oh well, it’s all over for another year and at least this week has been really rather pretty.

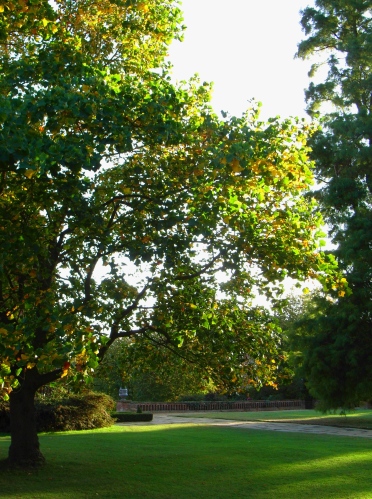
Tulip tree and lawn in early autumn.

Preparing Spring bulbs

Every autumn I pot up some bulbs to use in my containers in Spring so today I settled in to listen to Radio 4 and get the bulbs snuggled into their pots.

I put 5 Iris ‘Joyce’ bulbs in twenty 3″ square pots:

Planting Iris Bulbs

And 9 Narcissus ‘Tete a Tete’ in  eighteen 2L pots:

Planting daffodil bulbs

I also made up about twenty long tom 4″ pots with 4 daffs in each. I’ve put them all outdoors for now and round about Christmas time I’ll bring half of them in to the greenhouse (which is unheated but just a little warmer than outdoors) which brings them forward a little. Then when that first batch start to go over I replace them with  the second batch, extending the season by a little.

This gives me plenty of spring colour to put into my containers accompanying the pansies I grow from seed. Once the bulbs have done their thing they’ll get planted out in the garden to pop up in later years.

Spring bulbs flowering

Shuffling about in the Borders

Earlier this week I came to the conclusion that the border in front of the tower, while it worked well earlier in the year, was lacking a certain something in late summer.That old passionflower scrabbling around the doorway needs to go, but that’s a project for later in the year I think. It only looks passable for a few short months every year, and positively dreadful from about November to June. So out it will go. But today I was concerned with a lack of colour and particularly a ‘gap’, not really apparent in this pic, below the window.

The nursery was having a Dahlia sale which was a bonus and I picked up these two:

Dahlia ‘Playa Blanca’

Dahlia ‘Dark Angel American Pie’

The former had lots of dead heads and a small amount of mildew, and the latter are much more dwarf than their label suggests, (I suspect growth retardant – grrrr) so I expect next year they’ll be taller. At the moment they look a little odd in their new spot, with the ‘American Pie’ being a little shorter than the Sedum in front but I reckon they’ll fill it out nicely.

I also hauled out a load of Geranium cantabrigiense which had spread rather a lot and planted Phlox ‘Velvet Flame’ where they’ll be sniffable from the path.

And then, because I was aware these plants won’t really be ‘doing their thing’ fully until next season I slotted in some cheap and pretty Platycodon* in a couple of spots like this. My camera has real trouble with the blue of these flowers which are a lot more purplish in real life.

By next year they too should have filled out somewhat (and maybe shrugged off any growth retardant?) and be less squat and blobby. But for now they’re welcome colour and I do like the wierd bulbous forms of the flower buds.

One of the things I like best about planting out is visualising how the new plants will grow and work in the space. They always look a little gawky and awkward at first, but they soon settle in and start looking comfy (or look more and more awkward until they go to the great compost heap in the sky!) and that’s when you really start to see whether it all works (or not.)

*They are just Platycodon according to the labelling – speciesless plants are the new big thing dontcha know? Why not label things properly I ask you? Do they think their general customers will be scared off by a bit of latin? Maybe they are right. Sigh…

5 Little Steps Towards a Better Lawn

At Layer Marney Tower we are not overly precious about our lawns. We have areas of lawn which used to be occupied by trees or borders which have never quite recovered. Some of these spots are also our highest traffic places being just where the wedding guests like to hang out while the photographs are being taken. We also actually welcome the occasional daisy and have great affection for clover (in small doses) and so our lawns will never qualify for Great Lawns of the British Isles, should such awards exist.

Having said that I have felt that they could be improved, after all, if it’s going to be nonchalently hanging around in the background to the wedding photos a lawn needs to be reasonably attractive. This year I have started doing five simple things that have helped to bring the lawns up a step or two and I thought I’d share them in case any one else has been despairing over turf.

1. I raised the cut on the mower and started mowing more often. Like any other plant grass needs its leaf. Ok it’ll take being chopped about far more regularly than any other plant but if you take off too much at once you shock and stress the plant. Councils seem to be the worst offenders for leaving the grass for a fortnight and then shaving it to within an inch (or less) of its life. I aim to mow the formal lawns twice a week when it’s growing well and the less formal ones about three times a fortnight. If you’re taking off more than half the leaf at once – stop! Think of the poor little grass plant. If I’ve missed a cut for any reason (usually the weather) I cut it a notch or two higher than normal and then come back a couple of days later to take it down to the ‘right’ height. ‘Leave it long, cut it often’ has been my mantra this year and it’s definitely helped. Longer grass also takes traffic and drought far better than short grass.

2. I water. Sometimes. Rather than watering a whole lot, my aim is to keep the lawn from browning. Yes yes yes I know the recieved wisdom is that you just leave it to go brown and in autumn it will perk right up again! It will indeed, but drought stress is stress on the plant. A plant which is already being mown and trampled rather a lot and which we’d rather like to look nice when people visit or have a wedding here. So in particularly dry weather I’ve given the grass a really good soak. When there are signs of drought stress in the areas which tend to brown first but everywhere else is looking fine I’ve just done those areas and this selective watering seems to have worked quite well.

3. I pricked compacted and browning areas. We had a drought this Spring which broke in June. I helped the lawns to recover by pricking the surface of the soil in particularly dry areas. I’m not talking full on aeration here – I took a garden fork and pushed it into the soil by 1-2 inches and repeated this all over worrying areas. This helped water to get down into the soil, rather than just running off. It was a morning’s tough work but it was worth it!

4. I leave the clippings on. The ride-on mower I usually use for the less formal lawns (and the formal ones when I’m in a real hurry… shh don’t tell) is a mulching mower so always leaves the clippings on the lawn. This year however in dry spells I’ve been leaving the clippings on the formal lawns too and as I’m cutting more often I don’t get a ‘mown hay’ effect as the bits are pretty small. This helps retain moisture and it’s amazing how much quicker this makes the job too.

5. I’ve fed the lawns. Ok that’s usually routine maintenance isn’t it? Well, yes. But there has been at least one year when between the weather requirements, not doing it around the public, and other restrictions it just has not got done. So this year I’ve been a bit more proactive on jumping on time slots I can do it in and have done it twice, with an autumn feed due soon. This gives the grass the wherewithall to tough out wear and tear, drought and any diseases which may threaten.

I have to admit that once we were over the drought the Summer has been obligingly damp which has meant that the sprinkler really has only been out a few times. And of course there are still some areas which require some more focussed attention and a little investigation. On the whole though I’m pleasantly surprised how much effect I’ve seen from such minor changes to my routine.